

Destinations
You can create any number of Destinations.
Each Destination can have any number of Mix/Engine (ME).
Each Mix/Engine is composed of two layers than can crossdfade from Preview to Program.
Click on the +Dest button to add new Destination in your project.
Click on the +Mix. button to add new a new Mix/Engine in a Destination.
Select a Destination or Mix/Engine and click on the button to delete respectively a Destination or a Mixe/Engine.
Click on a Destination to edit the settings in the editor:
General settings:
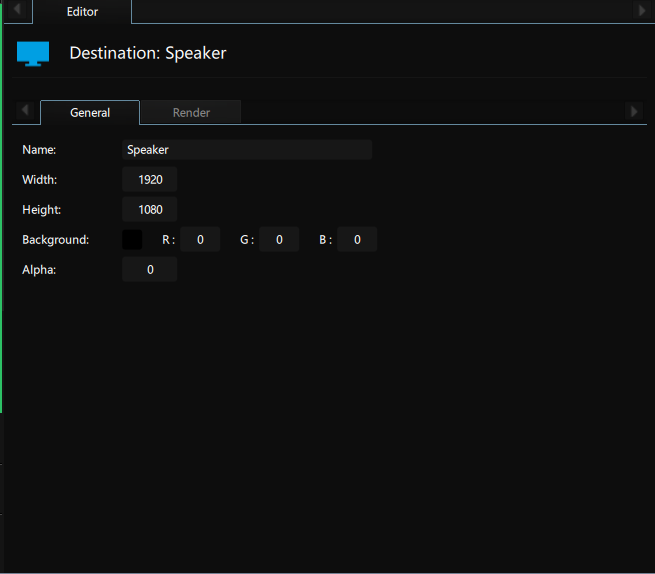
Name: name of your Destination
Width: width of your Destination (max 16 384 pixels)
Height: height of your Destination (max 16 384 pixels)
Background: it’s the background color if the alpha of your Destination is not transparent.
Alpha: Alpha value of the Destination. By default, the Destination is transparent, meaning that you can add PIP on top of your background.
Render Settings:
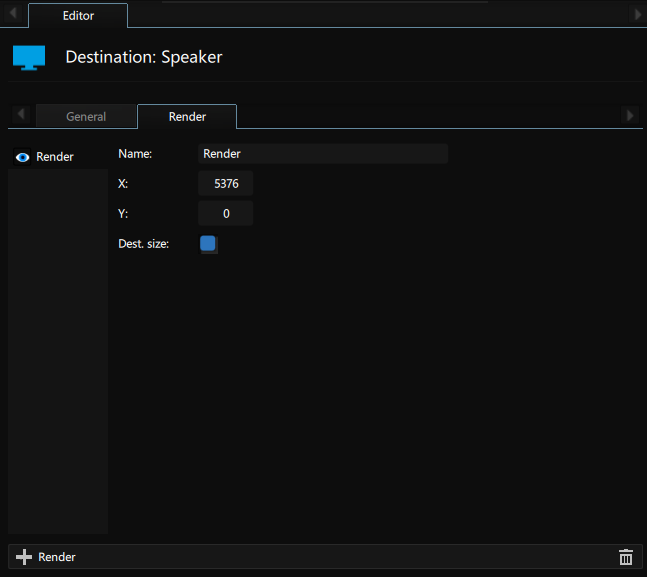
Click on + to add a Render. You need at least one render to have your destination visible in the Modulo Player. Most of the time you will only create one with size corresponding to Destination Size.
X,Y: top left position of your Destination in the Pixel Workspace of the Modulo Player.
You can create other Render for example if you want to send stretched version of the Destination in a Return output.
Layers:
General:
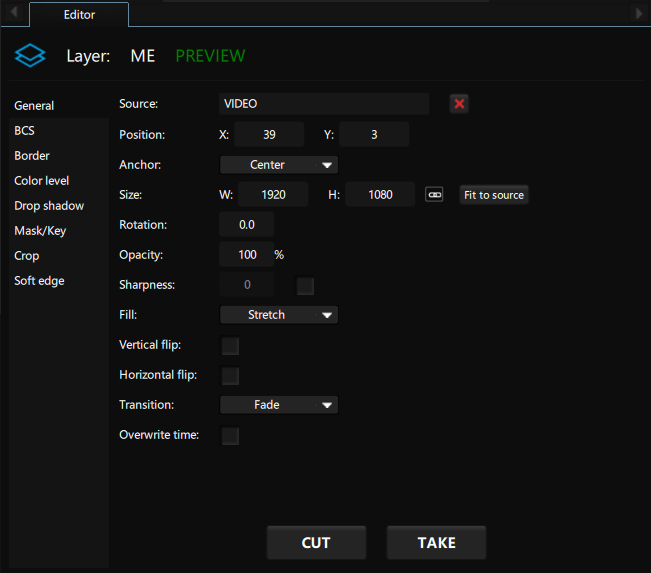
Source: drag&drop the source on this area.
Position: position of the layer
Anchor: anchor of the layer
Size: Size in pixel of the layer. You can clik on “Fit to source” to adjust the size of the layer with the size of the source
Rotation: rotation angle in degree
Opacity: opacity of the layer
Sharpness: You can add a sharpness to reinforce the edge of your layer
Fill: Size mode when the size of the layerdon’t match with the ratio of the source (Stretch/ Horizontal fit/ Vertical fit)
Vertical flip: flip the source vertically
horizontal flip: flip the source horizontally
Transition: the transition mode when the layer go from Preview to Program (Cut/Fade/Flying)
Overwrite time: if enable, enter the Transition time and this time will replace the default preset Transition time for this layer
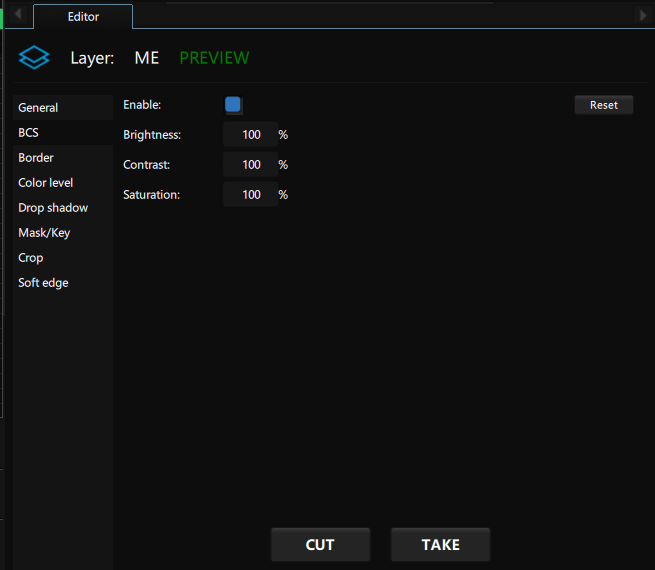
B/C/S:
You can Enable/Disable this property clicking on the checkbox.
Brightness/Contrast/Saturation values are in percent mode. 100% means a neutral value.
Border:
You can Enable/Disable this property clicking on the checkbox.
You can adjust theses properties:
Type: Hard or Soft (smooth)
Position: In (full border inside the Image), Center (half in the image, half outside), Out (border around the image).
Width: pixel width of the border
Radius: amount of roundness of the edge
Color: color of the border

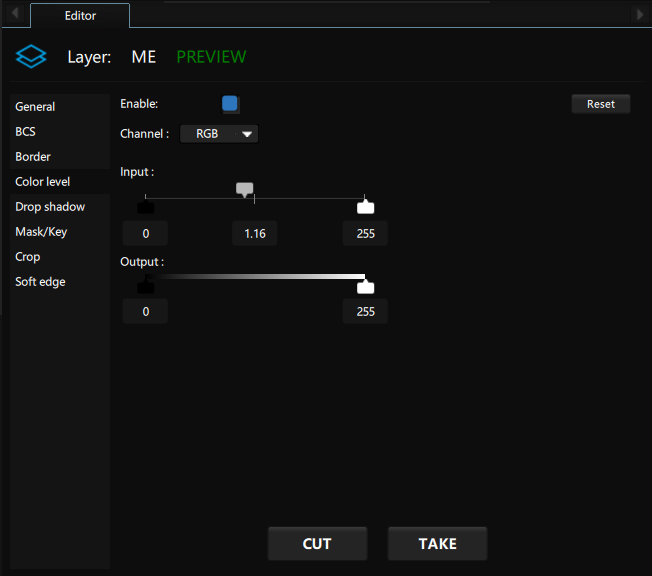
Color level:
You can Enable/Disable this property clicking on the checkbox.
The color level allows you to adjust RGB level for global RGB and channel by channel.
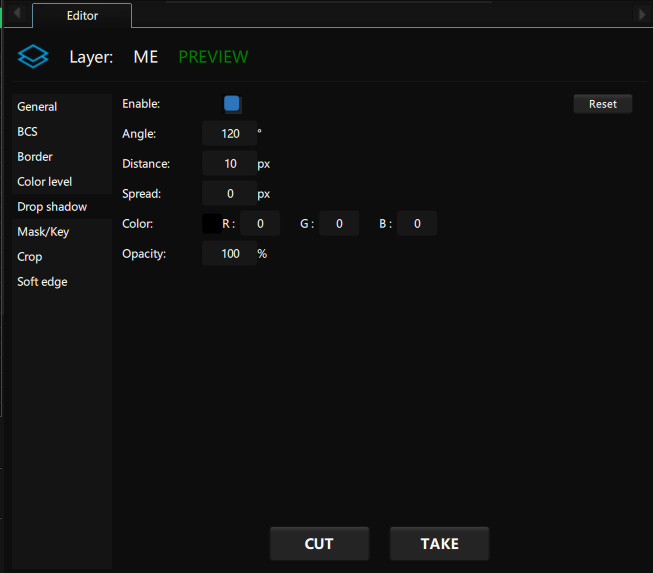
Drop shadow:
You can Enable/Disable this property clicking on the checkbox.
You can adjust theses properties:
Angle: angle around the center of the media
Distance: distance outside of the border regarding the media
Spread: allow a kind of smooth
Color: color of the drop shadow
Opacity: opacity of the drop shadow
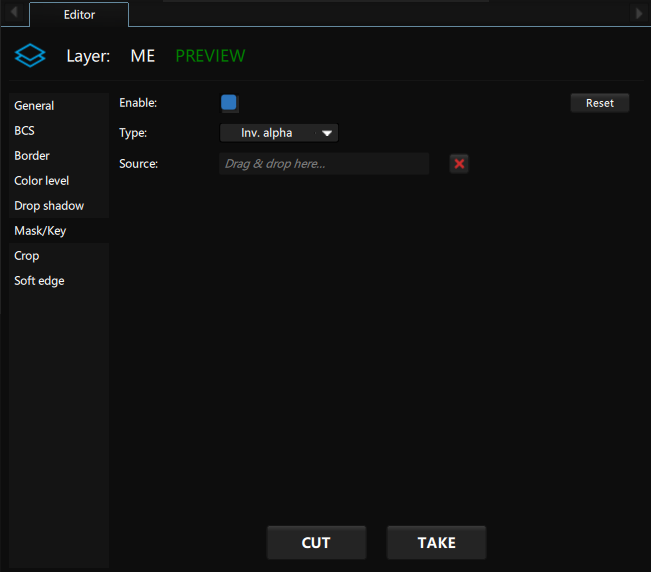
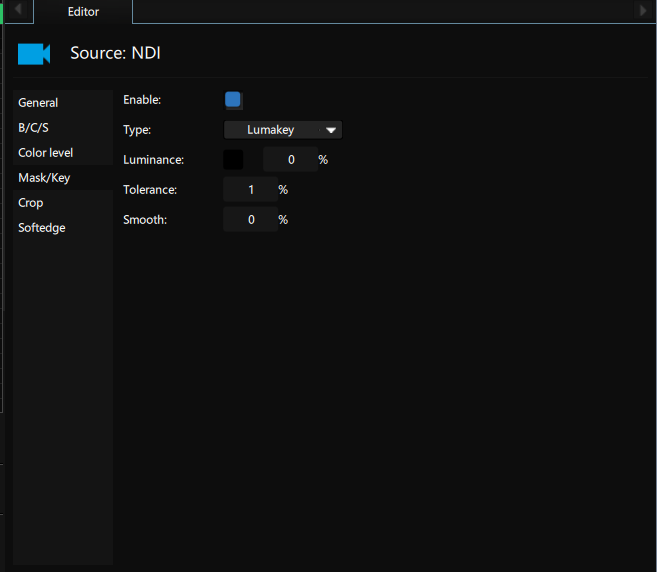
Mask/Key:
You can Enable/Disable this property clicking on the checkbox.
Choose the Mask/Key Type:
Alpha: use a live source as mask in Alpha mode. If the mask source has a pixel transparent, your resulting source pixel will be transparent, If the mask source has a pixel with full alpha, the resulting source pixel is unchanged.
Inv Alpha: use a live source as mask in inverted Alpha mode. If the mask source has a pixel transparent, your resulting source pixel will be unchanged, If the mask source has a pixel with full alpha, the resulting source pixel is transparent.
Grey: use a live source as mask in grey mode. If the mask source has a pixel black, your resulting source pixel will be transparent, If the mask source has a pixel with full white, the resulting source pixel is unchanged.
Inv Grey: use a live source as mask in inverted grey mode. If the mask source has a pixel full white, your resulting source pixel will be unchanged, If the mask source has a pixel with black, the resulting source pixel is transparent.
Lumakey: use the lumakey settings to do a real time lumakey filtering on your source.
Luminance: choose the luminance value to discard.
Tolerance: allow a more larger luminance value to discard.
Smooth: smooth the border to avoid a hard edge
Chromakey: use the Chromakey settings to do a real time chromakey filtering on your source.
Chrominance: choose the chrominance value to discard.
Chrominance Tolerance: allow a more larger chrominance value to discard.
Saturation Tolerance: allow a more larger saturation value to discard.
Value Tolerance: allow a more larger value to discard.
Smooth: smooth the border to avoid a hard edge
Crop:
You can Enable/Disable this property clicking on the checkbox.
You enter the number of pixels you want to crop on each border.

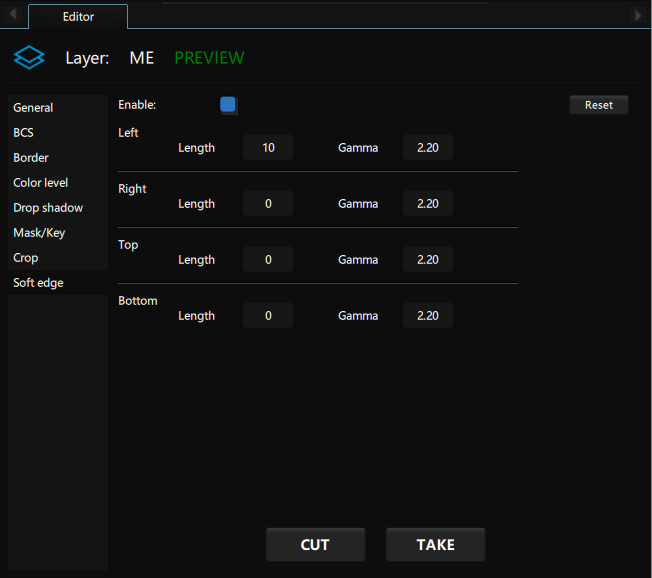
Softedge:
You can Enable/Disable this property clicking on the checkbox.
You can adjust the lenght of the softedge and the gamma value per border.
Need more help with this?
Don’t hesitate to contact us here.