
Use the LED mapping feature to convert a video to several Art-Net universe using the fast GPU in real-time.
To add a LED Mapping, click on the ![]() button and choose LED mapping on the popup menu. A new LED Mapping output is then created.
button and choose LED mapping on the popup menu. A new LED Mapping output is then created.

From this tab you can:
• Rename the new LED mapping output
• Assign a color to the new ouptut using the color palette. This color will then appear as a contour in Monitoring
• Set and Lock/Unlock the master opacity (intensity)
There are two ways to create a fixture:
• By creating a basic Fixture
• By loading a fixture file in the LED Mapping sub-folder
Basic fixture:
From here, you can create a new basic fixture.

• Enter the basic info for the fixture you are using. This way, you can save it as a preset and use it in the future in another show.
• Name the fixture and Enable visibility.
NB: You can add some basic product info such as, Manufacturer’s name, Product reference, etc.
• Select the Fixture Type from the dropdown list. This will define a protocol, and the number of channels
• Width: Number of pixels in the Horizontal line of the fixture
• Height: Number of pixels in the Vertical column of the fixture
• Primary Order: Select the direction in which the LED will animate
• Secondary Order: Select the pixel order on the array (which is the first and the last pixel)
• Option: Select Straight if you want all lines/columns to follow the same Primary order
• Select Zigzag if you want upcoming line/columns to start in opposite direction of the previous line/column
• IP: For a Broadcast fixture, leave this field blank
• For a Unicast fixture, type the IP address in order to stream Art-Net only at the assigned IP
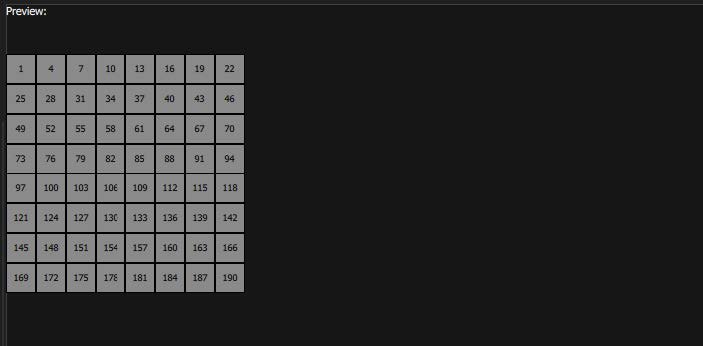
• Click on Show Preview to get a preview of the Patch. This will display the fixture patch in channels
• Universe: A single DMX512 frame of 512 channels is referred to as a Universe
• Subnet: A subnet is a group of 16 Universes
• Channel: Assign the index number of the first Channel of this Fixture
• Universe Overflow: Activate this option when the LED controller manages more than 512 channels
Fixture:
• Via the dropdown menu select the fixture file (contained in the project’s LED Mapping subfolder)
• Refresh the list of fixture files, or
• Add a new one. The new Fixture will be saved directly in the LED Mapping subfolder
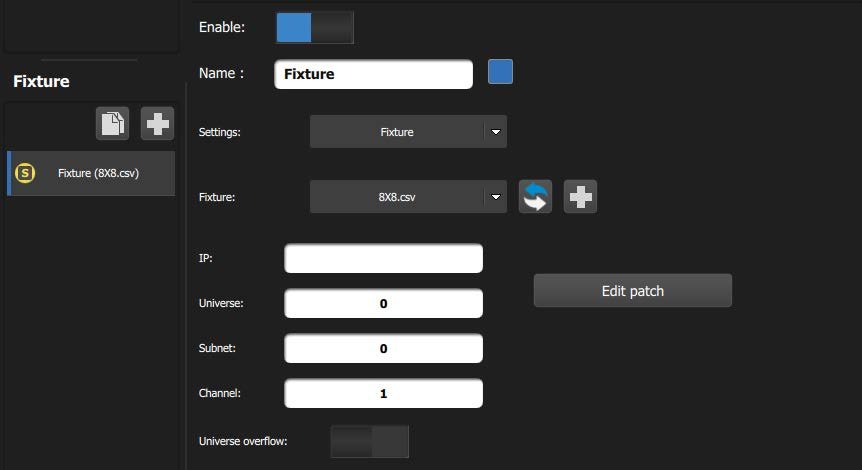

Once the preset fixture is loaded, click on Edit patch to open the Patch editor.
From there you can re-edit the Type, Width, and Height of the fixture.
• Click on Apply to refresh the new settings
• Pass from Pixel to Channel mode, to see the array with the art-net Channels. Once the fixture is updated, click on Save
Patching fixtures


After selecting an existing Fixture, you can click on Edit Patch to edit.
• In the panel that opens, you can enter basic info such as Manufacturer and Product
• You can also re-define the type of fixture (RGB, RGB + intensity , etc.)
• Parametrize the array of pixels ( Width, Height ) according to the LED type you are using. Once you set all fixture parameters, click on Apply to save the new configuration
• Click on a pixel to start patching. As you will notice, every time you click on a Pixel block, the index number increments. One click adds a pixel patch
• Change the mode from to , to see the patch by Channel
Keyboard shortcuts:
• To erase a patch from a pixel, re-click on it
NB: You can only delete the last clicked pixel.
• To select a straight line to patch: Click on the first pixel, hold down Shift and click on the last one
More complicated Patching:
You can jump pixels (leave pixels without a patch). To do so, click on CTRL and then on a block. Do it again. As you will notice, this keyboard shortcut increments one index every time you click.
Once the Patching process is over, click on Save.
You are now ready to test your device.
Mapping


Once the Patch of the Fixture is done, go to the Mapping tab.
In order to display a media to the LEDOutput(s) go to the Playlist tab and add the media file. Go to the Cue that contains this media.
Back to the LEDOutput > Mapping subtab:
Take an image of what is currently playing.
Activate/deactivate the in order to toggle visibility
Enter the starting point of the capture
Assign the Anchor point of the media
You can also change the scale (in pixels or percentage) by preserving the ratio or not.
CAUTION:
In order for your media to match perfectly with the LED Output and avoid any unwanted anti-aliasing, you should map media files that are pixel perfect to the Fixture.
Need more help with this?
Don’t hesitate to contact us here.