
In this chapter we will prepare Modulo Player for the calibration.
Important License information
If you would like to add the autocalibration module to an existing setup, please contact our customer service and a specific license dongle can be sent to be added to your system.
- Start the Modulo Player Remote application.
Configure the Outputs of the server
- On the Control page, click on Settings and go to the AMD tab
- Then force the EDID and create the EYEFINITY
Create a new Show and transfer media Pattern
- Take care the Modulo Player server is stopped
- In the Control page, go to Settings and define a new Project Folder

- On the Transfer page, transfer the Dome_pattern_polar_4096×4096.jpg media from your Modulo Player Remote (left part) to the Modulo Player server (right part).
Define the Workspace dimension and add Outputs:
- Go to the General page and define the workspace with the same size of our media, which is 4096×4096
- Go to the Output page
- You can use the Wizard tool to create the five outputs we need
- On each output, change the MAP dimensions from its default value 1920×1080 to 4096×4096
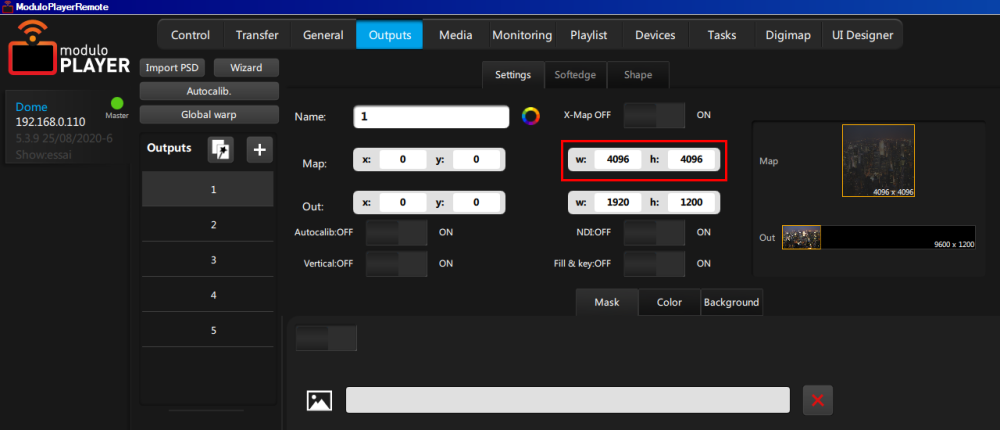
Indeed, each video projector needs to MAP all the workspace content to perform the calibration.
- Add the pattern media on a Cue into the Playlist:
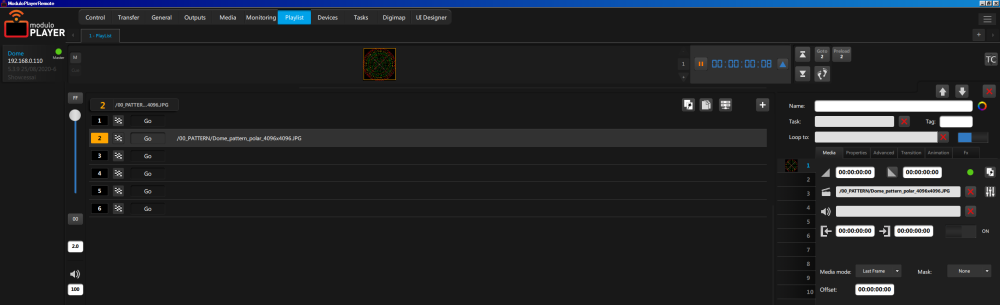
The projectors should now project the pattern picture.

We are now ready to start the autocalibration.
Need more help with this?
Don’t hesitate to contact us here.