
Open the prepared project
- If you don’t have it yet, download the media kit here
- Open Kinetic Designer
- Choose Open and browse into your computer
Add the Deltacast HDMI or SDI source
- In the Media tab, click on
![]() and add a Deltacast media
and add a Deltacast media
 and add a Deltacast media
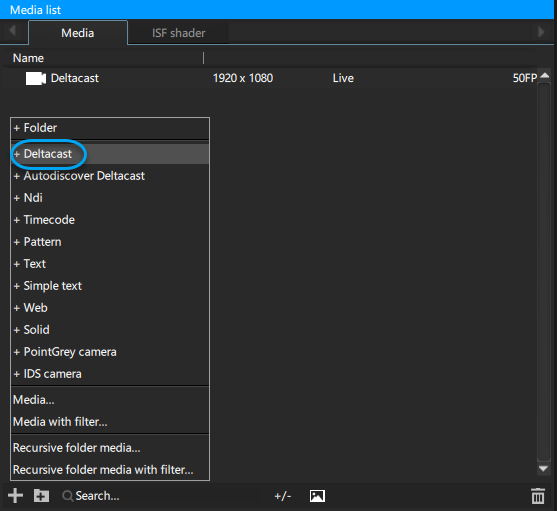
- Set the deltacast parameters regarding to your configuration (HDMI or SDI)
- If you followed all the steps of the Panasonic AW-UE150 configuration, its resolution should be 1920×1080 at 50Hz.

Add a 3D camera into the 3D Scene
- Click on Layout > 3D and have a look at the prepared 3D Scene
- Move in the 3D using your mouse until you are closer to the scene
- Press C on your keyboard to create a camera from this point of view and rename it Camera_AR
Add a Panasonic device to control the Camera Shift/Zoom/Focus from Kinetic Designer
- In the Devices tab click on
![]() to add a new PTZ camera and select Panasonic AW-HExx
to add a new PTZ camera and select Panasonic AW-HExx - In the Editor tab, type the IP address of your Panasonic AW-UE150 camera.
*If your camera is connected to the Kinetic network, you should see device’s LED higlighted in green 
Add a device Camera AR Panasonic UE-XXX FreeD
- In the Devices window click on
![]() open the Tracking part and select Camera AR Panasonic UE-XXX FreeD
open the Tracking part and select Camera AR Panasonic UE-XXX FreeD
- Then, in the Editor tab, go to General tab, select Panasonic AW-UE-150 from the Camera dropdown menu and drag and drop your 3D Camera_AR from the 3D Scene list to the 3D Camera field
- In the FreeD tab, check that port the number is the same that the one set in the Pannasonic AW-UE150 camera (11311 by default)
To check the communication port of the Panasonic camera please check again the Panasonic configuration page.
Need more help with this?
Don’t hesitate to contact us here.