
Description
The timeline is the main part of the 2D compositing engine. By default, projects are created with a single timeline but you can create any number of timelines from the Timeline list panel.
To display a media on your timeline simply drag & drop it from the Media list panel into the timeline. The media ‘In’ point will be set at the playhead.
You can preview your media in the Preview panel.
Timeline playback controls:
Use the space-bar to Play/Pause and navigate in the Timeline. Use Shift key & click to snap media In to Playhead. More After Effects Shortcuts are available, please refer to the Shortcuts section.

You can toggle the  button to launch or stop the timeline timecode.
Double click on the timecode editor to change the timecode value. It’s also possible to maintain a click and scroll to adjust directly the timeline.
Use the  button to toggle timeline activity: If you toggle off the timeline, the timeline is no more displayed and you save computer ressources.

Click on the  button to center the view around the playback head.
Then just after you see where is located your playback head and you can choose the part of the timeline you want to display.
Click on the  button to choose the magnetise option. it open a popup window where you can choose if you want:
- Magnetizing on rules: magnetize the playback head according to the tick on the rules
- Magnetizing on Layer in/out: magnetize the playback head according to the in/out of media layers
- Magnetizing on keyframes: magnetize the playback head according to the keyframes
Click on the toggle  button to activate the auto-scroll of the playback head.
Click on the  button to open the curve editor.
Left part:

Move the opacity master to adjust the opacity value of the timeline. It’s possible to choose a fade time (in seconds) to have a smooth transition when you click on the “0” or “100” fade button.
Bellow you can adjust the master audio volume of the timeline.
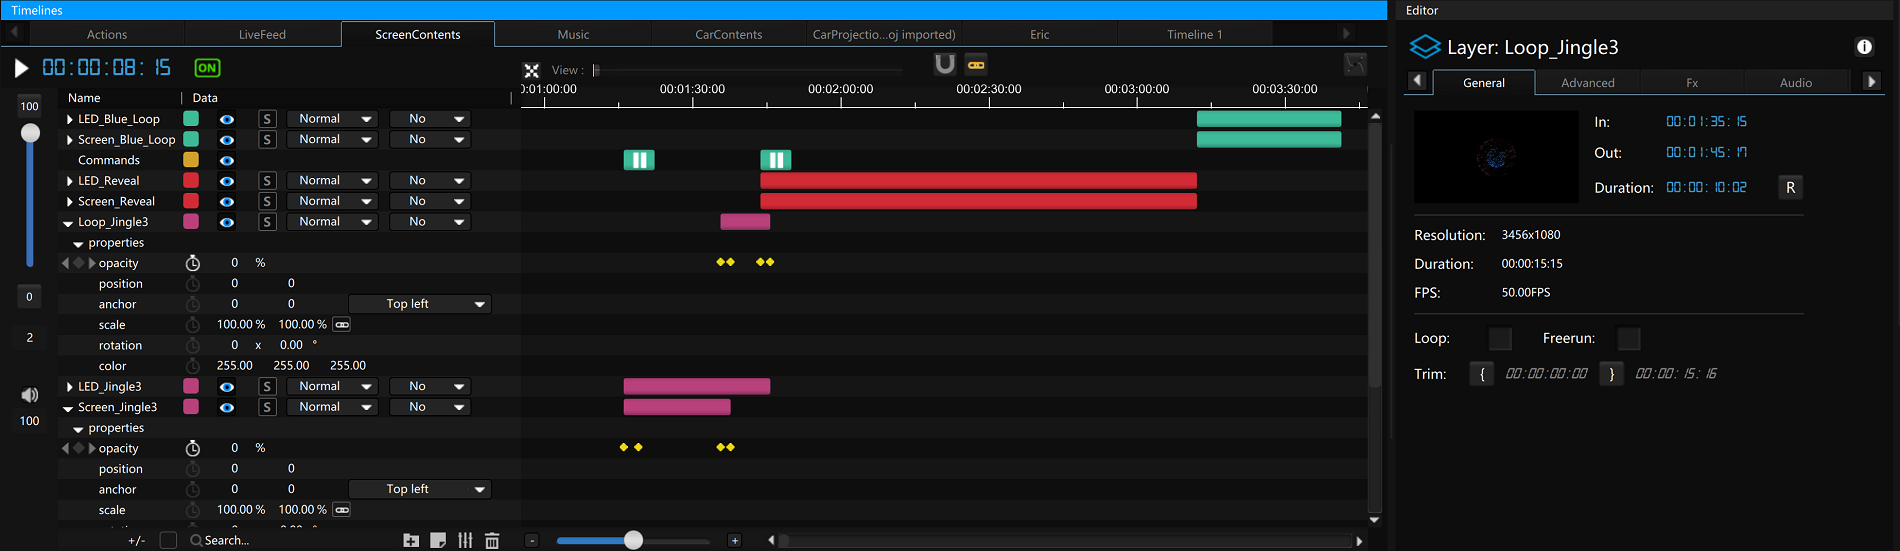
layers:
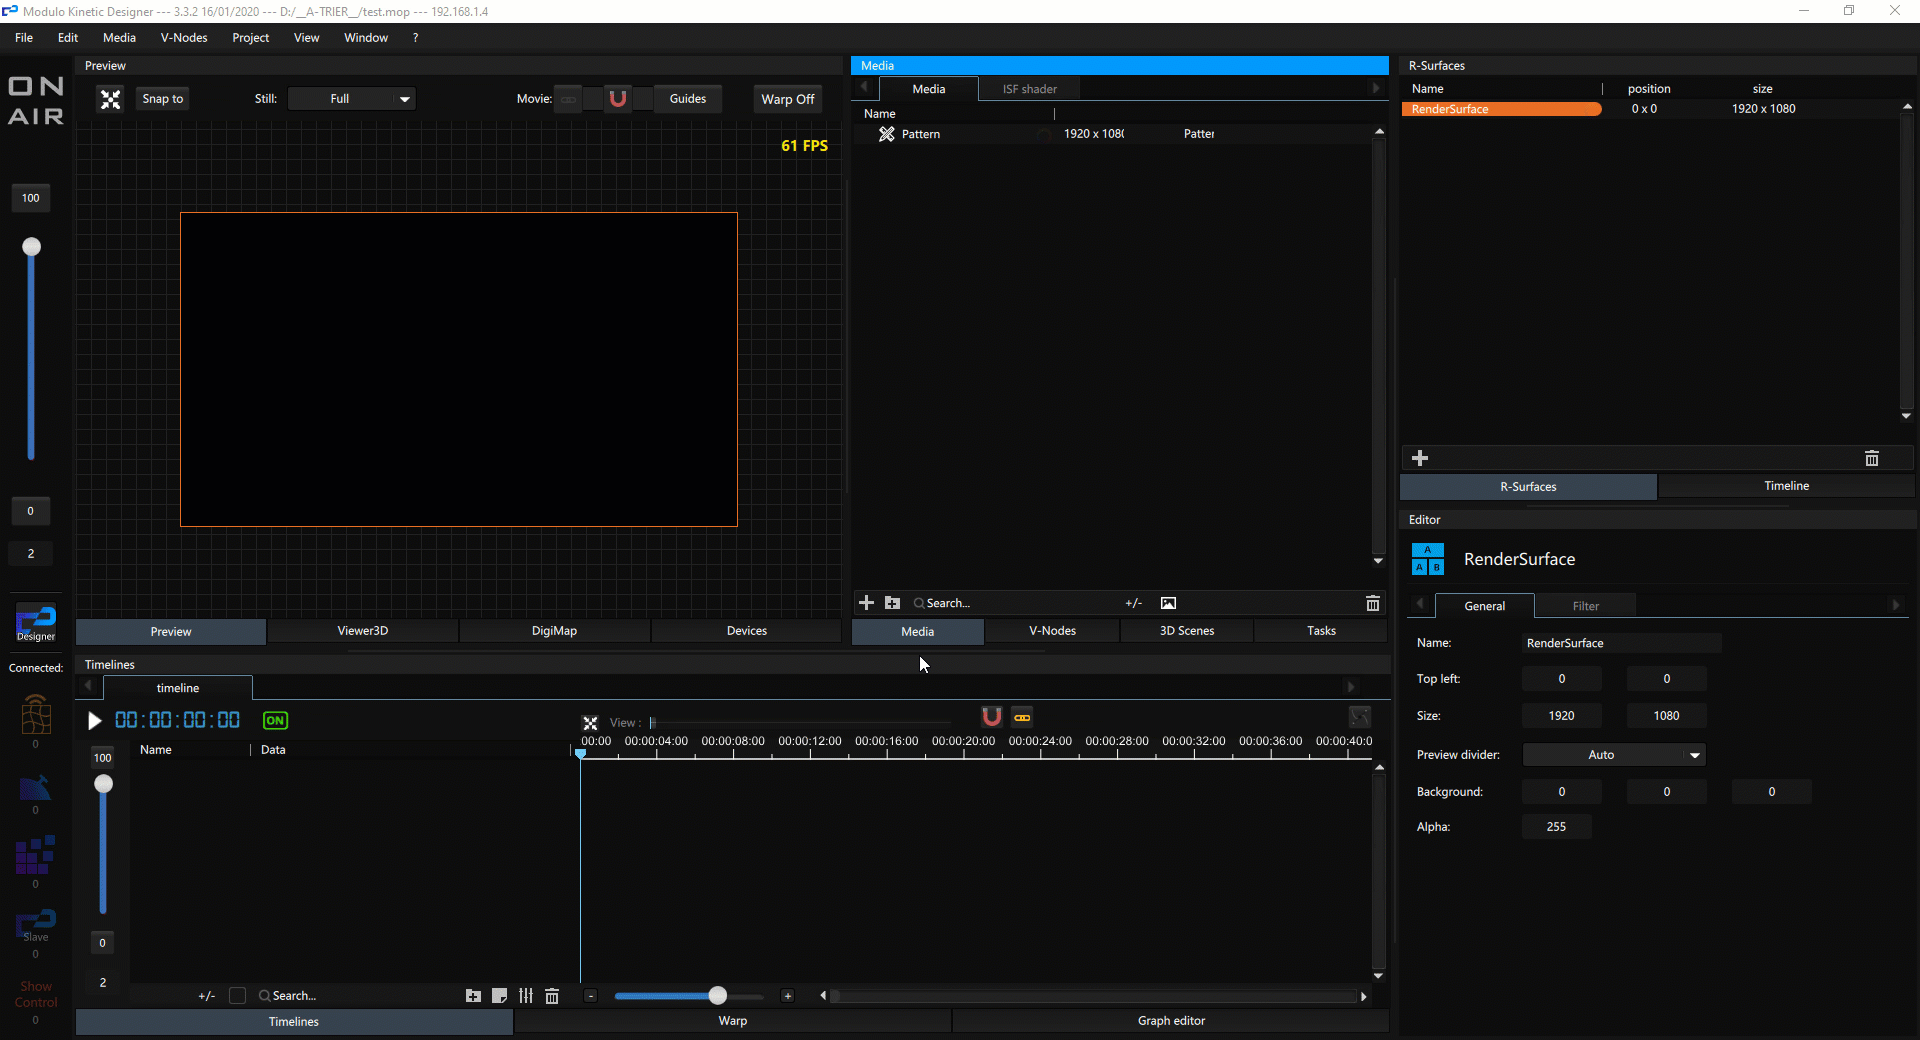
You can drag&drop media in the left part of the timeline. Media ‘In’ will be located at the playback head. It’s also possible to drag&drop other kind of content, including:
- 3D camera or 3D Video Projectors: drag&drop a camera or a projector from a 3D scene and it will then render the content from the point of view of your camera/projector
- Render surface: it’s possible to render the real time content of a render surface in a timeline like you do for a traditional media.
- A 3D animation to synchronize the 3D animation to the timeline
- Directly a 3D Node to animate position/scale/rotation
- A 3D material to animate some properties (for example diffuse, specular, ambiant for a standard material)
- A Dmx device to control a channel with keyframes directly from the timeline
- A virtual audio channel or an audio group
- A variable to animate the value
left part:

It’s possible to choose a color for each layer to find them easily. When you drag&drop a media in the timeline, there is default color per kind of content (it’s possible to customize theses colors in the menu Project/Project settings…/Default colors
the  button allow you to toggle the blind of the layer.
For media layers:
You can also use the  button to have only solo layers visible.
For each parameters, you can add directly edit the value.
Click on the  button to activate the animation. You can then add keyframes and choose the interpolation type.
You can choose for each layer, the blending mode.
Here is a list of available blending mode: Normal, Add, Multiply, Multiply x2, Screen, Min, Max
It’s possible to use a layer as a mask. The mask will have effect on the top layer of the the mask layer.
Here is a list of available mask mode: No, Alpha, Grey level, Alpha inverted, Grey level inverted.
bottom tab:

click on the +- button to open a popup menu, then you can:
- expand all layers
- collapse all layers
- expand selected layers
- collapse selected layers
Click on the color field to filter visible layers by color.
Click on the search field to filter visible layers by name.
Click on the  button to add a group of layers. You can then move or create layers in this group. A virtual in/out is automatically calculated for the group (temporal bounding box of the layers in the group). It’s very usefull to organize layers in kind of folders and easily adjust global timecode for a group.
Click on the  button to add a sticker layer. In this layer, you can then create sticker with a name to have a information marker.
Click on the  button a command line. In this command you can then create:
- a pause command (select the command layer and go to the corresponding editor to find the add pause button)
- a loop command that allow to loop to a timecode in the timeline (select the command layer and go to the corresponding editor to find the add loop button). then adjust the loop position on the loop editor (select this loop cue).
- a stop command that go back to zero timecode (select the command layer and go to the corresponding editor to find the add pause button)
- drag&drop a device to control the device directly from the timeline
- drag&drop a task (for example when you need to control 20 projectors at once synchronized on the timeline, it’s easier to first create a task with the action on all video projectors, then drag&drop the task in a command layer)
- drag&drop Dmx, VNode, Output, Graph, … or anything that can be dragable in the timeline command.
When you want to delete some layers, select them and click on the  button.
Animation:
if you click on the button you will display the curve animation editor:
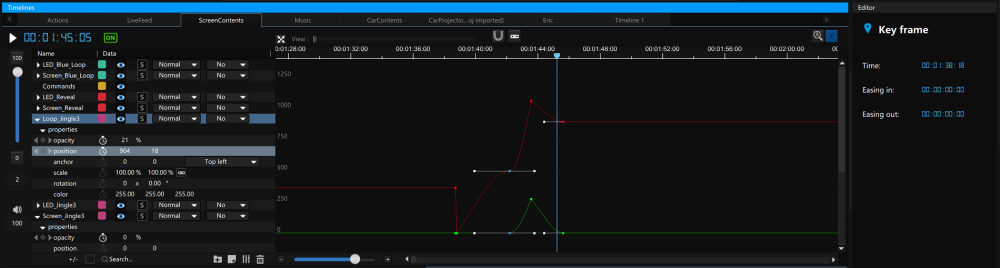
Example: launch a Midi note from the timeline
Need more help with this?
Don’t hesitate to contact us here.