
The Tracking tab consists of two main elements allowing the control of tracking groups and cameras.
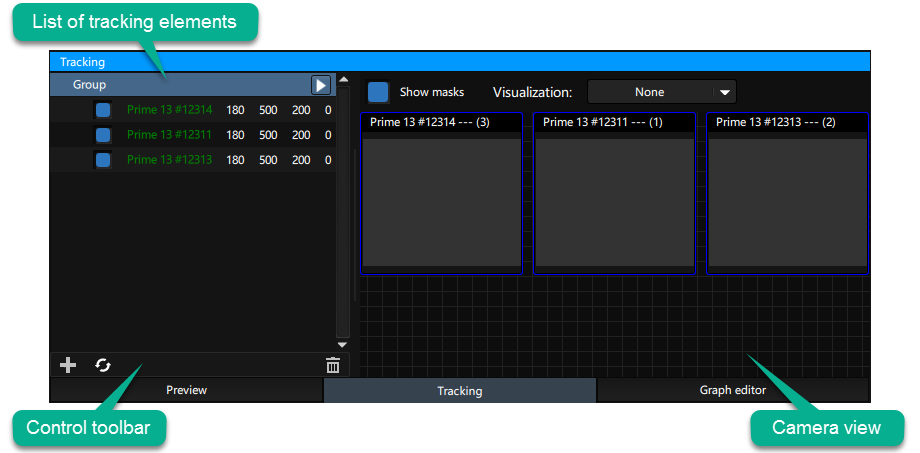
List of tracking elements
The left panel of the tracking tab represents a tree view of tracking groups and tracking cameras (see image above)
Each tracking group has its name displayed (editable on double-click) as well as the button  . This button allows starting/stopping the tracking.
The button is not active unless the calibration has been performed.
Camera entries have the following pattern:
| Enabled | Camera name | FPS | Exposure | Threshold | Led intensity |
|---|---|---|---|---|---|
| on/off | editable name | 30-240 | 0-10000 | 0-255 | 0-9 |
| on | Prime 13 #12345 | 180 | 500 | 255 | 0 |
All this values can be modified in the correspongind Editor (camera and group).
Control toolbar
The following actions are available:
Adding new cameras: click on  button on the toolbar in order to scan the network for cameras that are not already present in the tree view
Create new group: to add new tracking group click on  button
Delete group: to delete a tracking group click on  button. Make sure that the group you want to delete is selected.
Delete camera: click on button to delete a tracking camera. Make sure that the camera you want to delete is selected.
Add camera to group: in order to add a camera to a group, drag the selected camera and drop it on the group.
Camera viewer
The camera viewer displays the image from the selected tracking element. For groups, it displays images from all cameras of the group. For cameras, only the selected one is displayed.
Show masks option allows displaying masks configured for the given camera.
Visualization mode has four options presented below.
| Full | Full+Points | Points | None |
|---|---|---|---|
Need more help with this?
Don’t hesitate to contact us here.